Last updated on August 17, 2018
I did this a couple of years ago, with certificates that had a 1 year expiry date. Then my certs expired, and I’d forgotten what to do. So I figured it out again, and this time I’m writing it down.
There are two ways to setup client auth in OpenVPN, a shared secret and TLS certificates. TLS certificates are the preferred way if you can manage them, as they make it possible to revoke access to devices without having to change the shared secret for every other device.
To do this you need to setup a certificate authority and sign and issue your own certificates. Most OpenVPN guides tell you how to do this using OpenSSL and it’s associated long cryptic commands. I like my method better.
XCA
XCA is a cross platform graphical key and certificate management tool. And I find it far more convenient to use than OpenSSL since I can point and click my way through what I need to get done.
You can download XCA from their official project page at: https://sourceforge.net/projects/xca/
Install it, and start it.
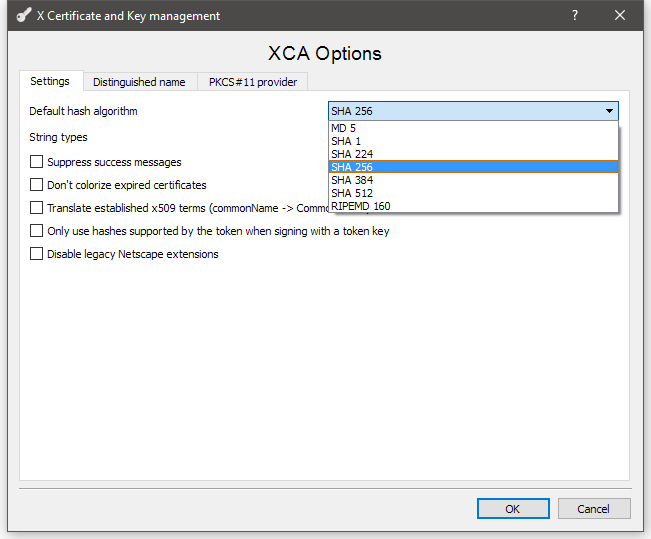
Before you get started, you should change the default hashing algorithm from SHA1 to SHA256. This is set under File -> Options.
Setting up Certificate Templates
TLS certificates have various parameters that dictate what they can be used for (i.e. digital signature, web client auth, web server auth, etc.). OpenVPN requires that the certificates have certain key usage paramters set for either client or server usage. Plus there are some things we might not want to have to fill in all the time too.
Switch to the Templates tab.
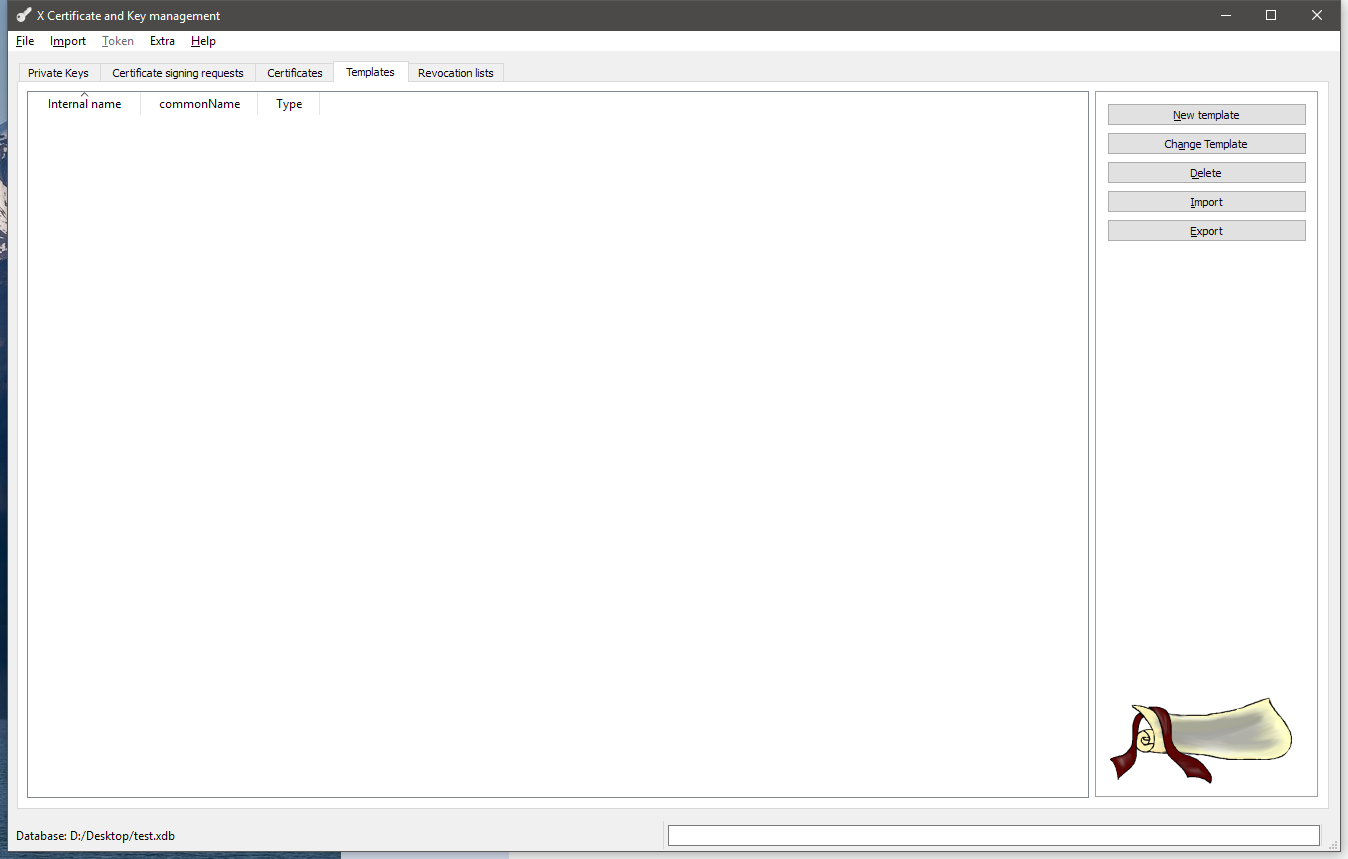
And click new template.
This will pop up a window asking what preset template value to start with. Choose nothing.
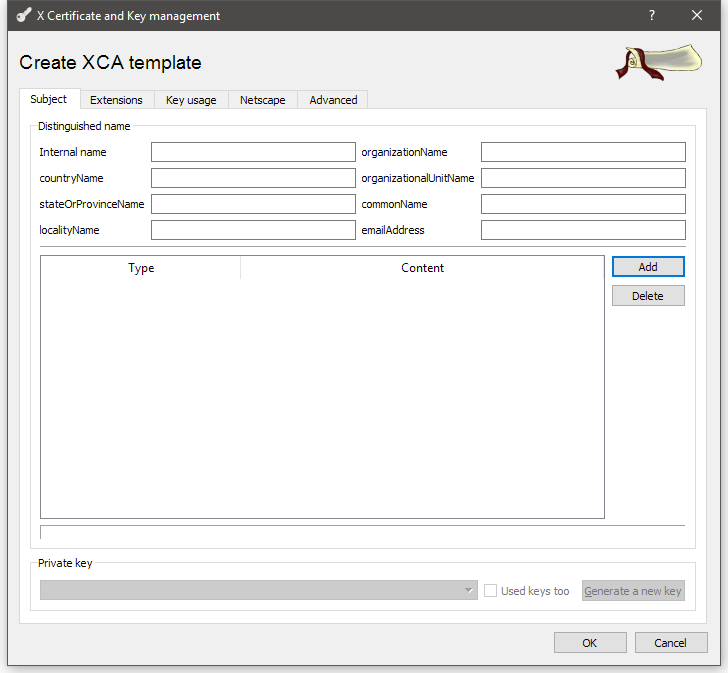
On the first tab we can setup subject related parameters. OpenVPN only cares about the commonName parameter, but that has to be set specifically and differently for each client certificate.
Set the Internal Name value to what you want to call the template. You’ll need to setup 2 templates, one or the server certificate and one for the client certificates. OpenVPN Server, and OpenVPN Client are good names, but anything will do.
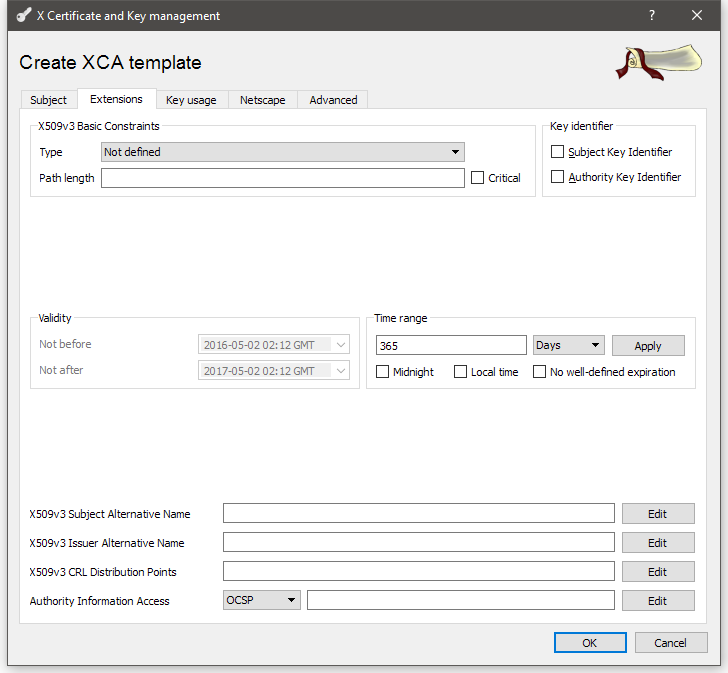
The next tab is the extensions tab. It’s useful here to set a time range if you want the certificates to be valid for more than a year by default. If you check no well-defined expiration the certificates will remain valid effectively indefinitely.
There’s a balance between security and usability in terms of setting an expatriation length. For my home network, I don’t want to keep having to issue certificates every year, and reinstalling them. But I don’t want them to last indefinitely either. Pick a number that makes sense to you, and for your application.
On the Key usage tab, you’ll want to check the following options for the server template:
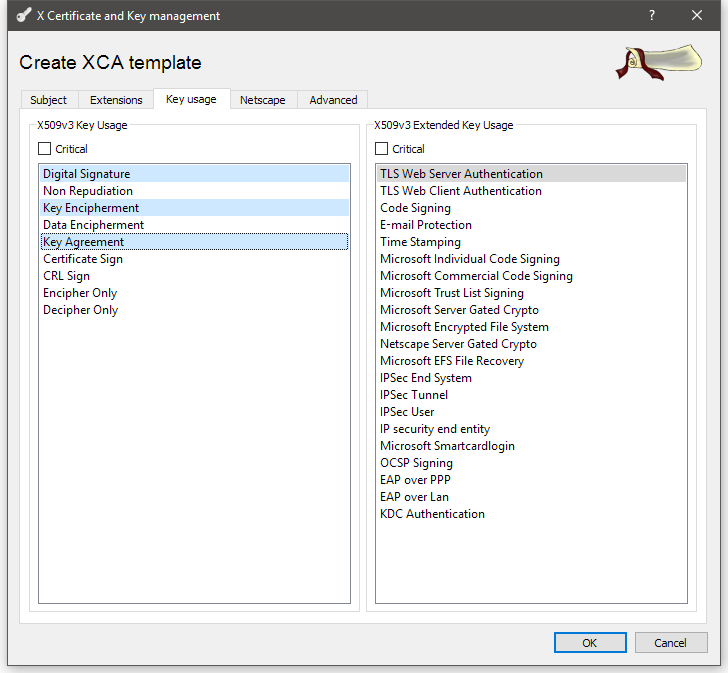
And for the client template:
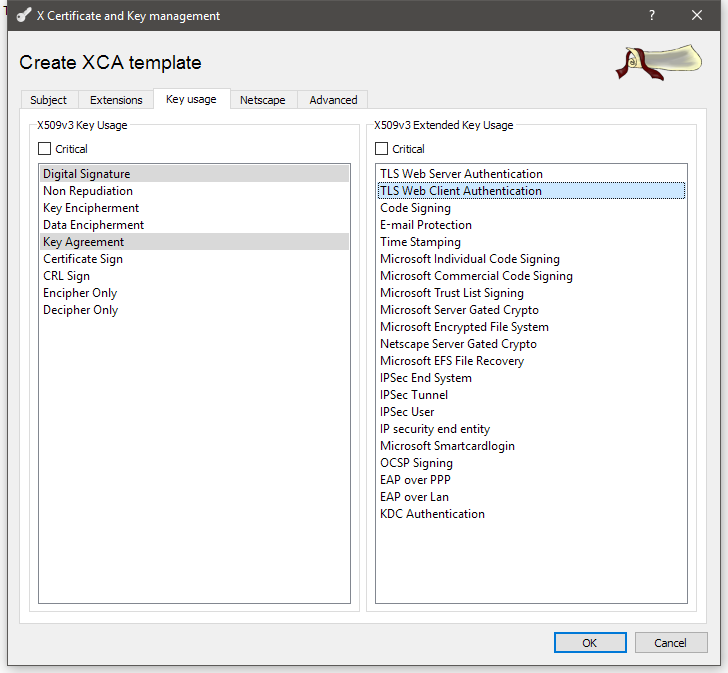
Once you’ve got the key usage setup, click OK to save the template.
Setting up the CA
OpenVPN uses a certificate authority to insure that all the keys are signed by a central source, and so the server can verify that the clients haven’t had their certificates revoked. So we need to set one up.
Switch to the Certificates tab and click the New Certificate button.
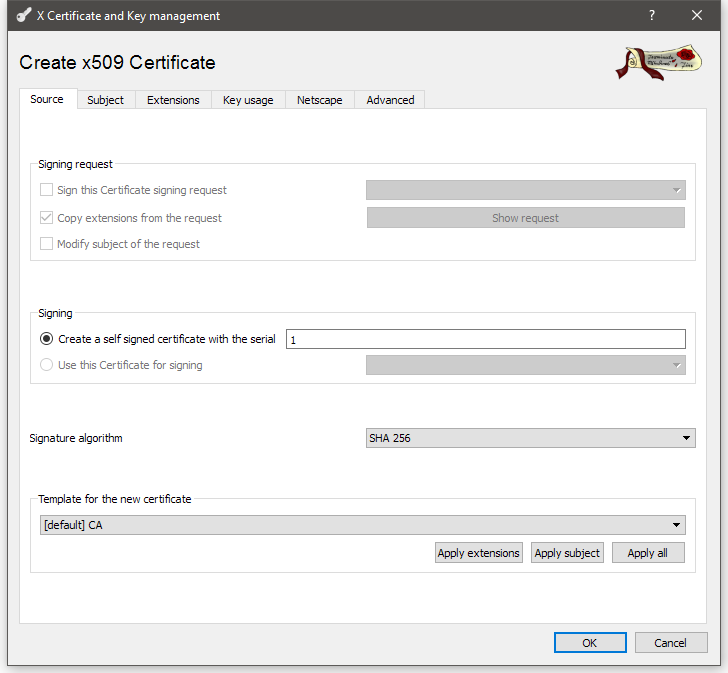
Since this is the CA, it has to be a self signed certificate, so you’ll want to leave the signing set to Create a self signed certificate with the serial. I’m not aware of any advantages to changing the serial number, so you can leave at it one.
The signature algorithm should be SHA256, like we set the default when we started.
Since this is a CA the template should be [default] CA, and click Apply All under that drop down.
Moving on to the Subject tab.
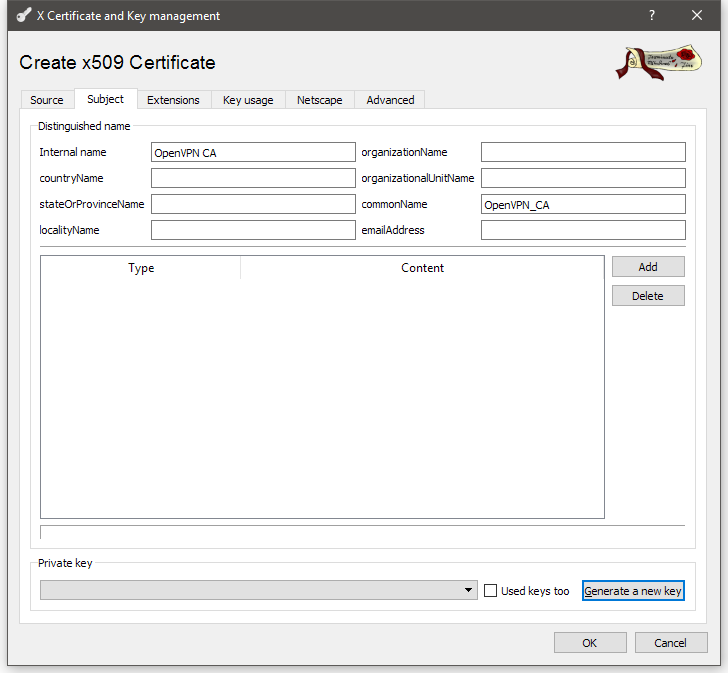
Like the template file, the Internal Name filed is what XCA will display in the UI. I’m calling this certificate OpenVPN CA so I know what it is. The only other field that’s relevant, AFAIK, is the commonName field, set this to something that will be unique within your CA, like OpenVPN_CA or similar.
We also need to generate a key to sign the certificatel. You’ll want to have unique keys for every certificate you create. You probably shouldn’t reuse old keys, but it’s okay if you mess up the certificate creation and need to regenerate the certificate.
Click Generate a new Key and you’ll get the following dialog.
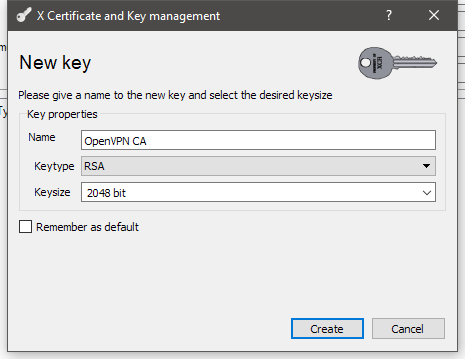
XCA will automatically populate the name of the key with the value that was set in the internal name for the certificate.
In my experience RSA keys are the most straight forward and just work, and work pretty much everywhere. Keysize should be at least 2048. OpenVPN will support 4096 bit keys for the best possible security.
Presently, the benefits for >2048 bit keys is small, and there is overhead for processing them. For someone concerned about state-level attacks against their networks, bigger keys would be desirable.
Finally set the time range or valid end date on the extensions tab to how long you want your CA’s cert to be valid.
Click OK to create the certificate and you’ll be returned to the main window.
For the client and server certificates, start by right clicking on the CA entry, and clicking new from the context menu. This will set that certificate as the CA that will sign the new certificate by default.
For the OpenVPN server, you’ll repeat the same process as you did for the CA, only you want to change the Template for the new certificate drop down to the template you created previously for the OpenVPN server.
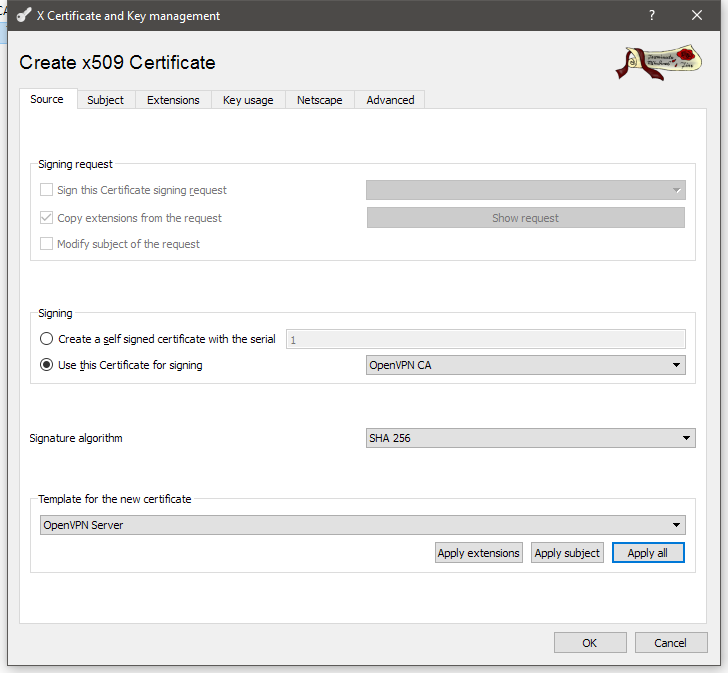
Also double check that the CA is signing the certificate and that the signature algorithm is SHA256 as set by default.
The rest of the process is the same as the CA certificate. Fill in the Internal Name and commonName (this can be the hostname of the OpenVPN server) fields for your server certificate, set the end date, double check that the same Key Usage fields are set as shown in the template setup. And click when everything is done.
Client certificates are created in an identical fashion, only using the OpenVPN Client template (or whatever you called yours) instead of the OpenVPN server template.
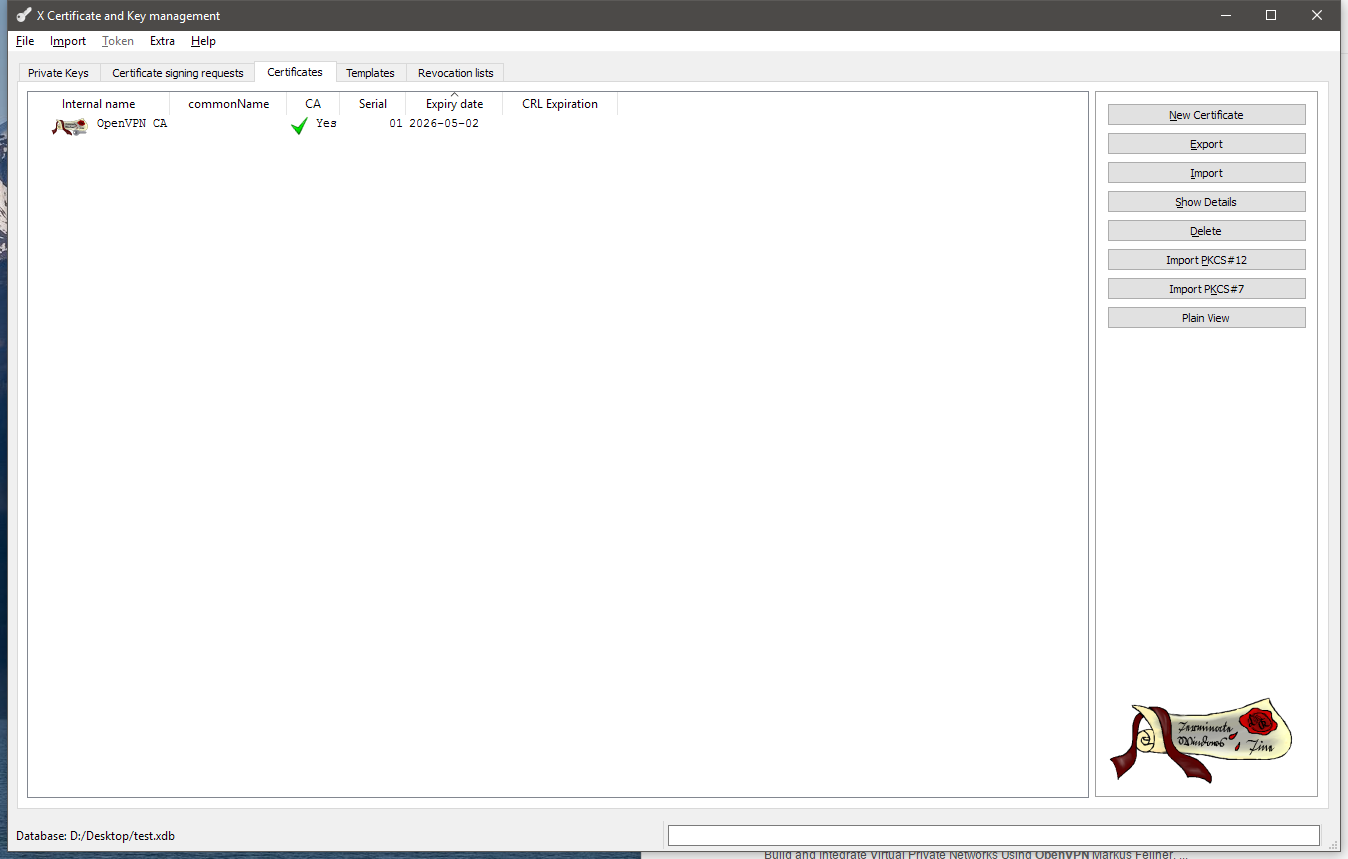
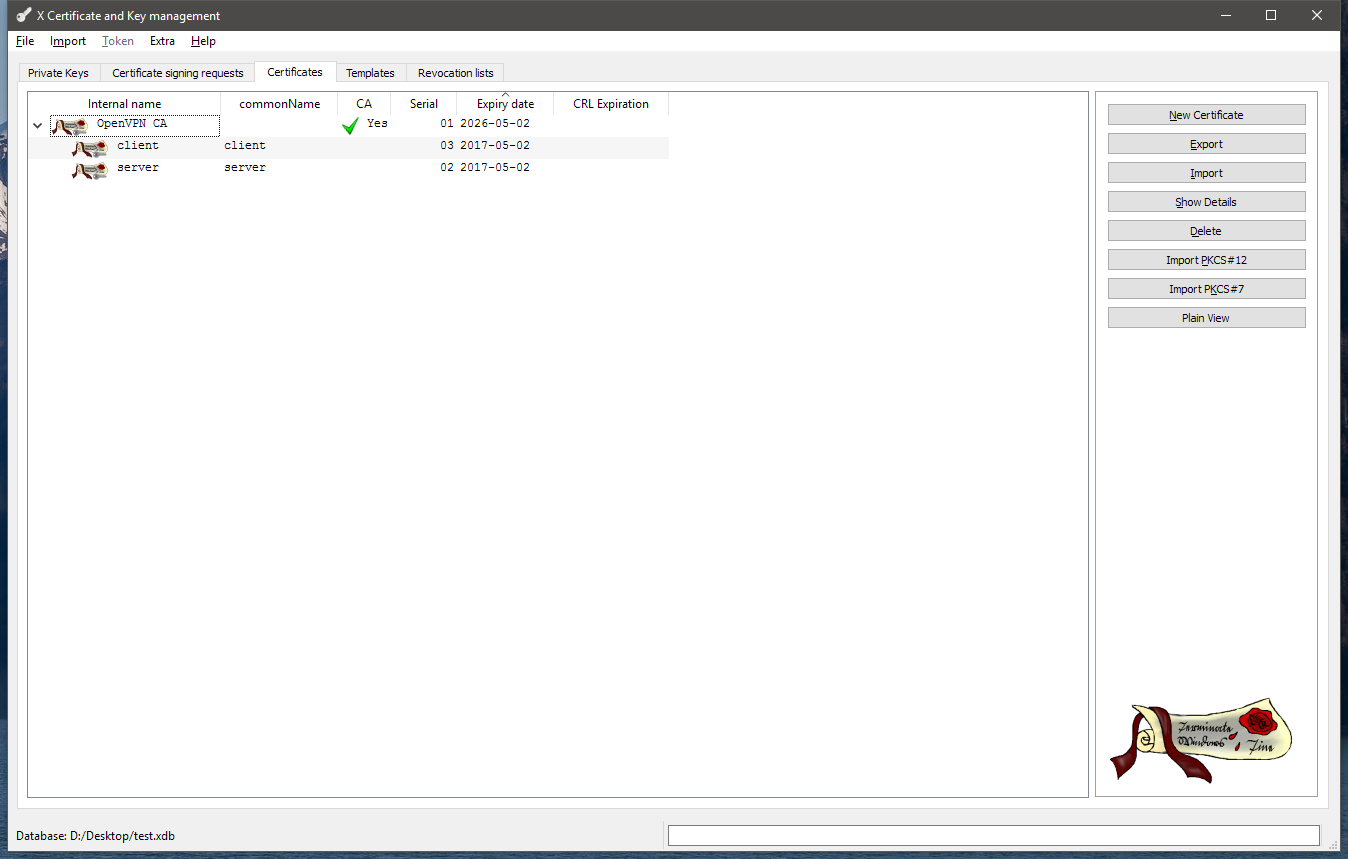
When you’ve created your server and client certificates you should have something that looks similar to the following image (with different internal and common names and probably more certificates).
Building the CRL
A CRL, or certificate revocation list, is a file that tells the OpenVPN server which client certificates are no longer valid. This is what’s used to disable clients that have been lost or need to be blocked from being able to access the server. And ultimately is the whole point of setting up a certificate based auth instead of just using a shared key.
To do this right-click on the CA certificate and from the CA entry in the context menu, click Generate CRL.

All of the settings can be left at the defaults here. Just click OK.
There will now be a CRL on the Revocation Lists tab, and a CRL Expiration date on the CA line in the Certificates tab.
Exporting Certificates
To use the certificates you need to export them, in a format that you can upload to your server and devices.
The OpenVPN server needs:
- The CA’s certificate
- The CA’s revocation list (CRL)
- The Server’s certificate
- The Server’s key file
Each OpenVPN client will need:
- The Client’s certificate
- The client’s certificate’s key file
For OpenVPN clients, the certificates and keyfiles should be exported as a single PCKS #12 file with a password to insure the security of the certificate between XCA and when you install it on your device.
To export a certificate or revocation list, click on the cert you want to export and click Export on the right column.
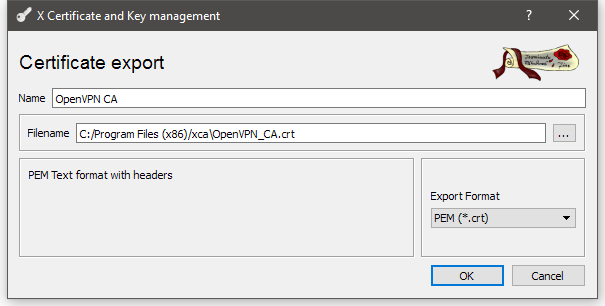
For the CA cert, Server cert, you want to use the PEM (*.crt) export format.
For the Client cert, if you’re going to iOS devices, you want to set the Export Format to PKCS #12 (*.p12). This will also require you to set a password on the exported file when you export it and it will include the key file for the client cert.
Upload the respective files to their respective devices, and being the configuration process of OpenVPN itself.
Diffie-Hellman Params (DHParam)
One final thing to export from XCA is a dhparam file for your server. To generate this go under the Extra menu and select Generate DH parameter. You’ll be prompted to set the parameter bits, set this to 2048 or higher.
Many sources recommend setting your hdparam file to match the size of your private keys.
Upload this to your server along with the certificates from the last step.
OpenVPN Server Config
On the server, you’ll need to move the ca.crt, server.crt, server.pem, ca.pem (CRL), and dhparam files into your OpenVPN config folder (typically /etc/openvpn) and change the permissions so that they can be read by your OpenVPN user.
I’ve provided below an example annotated server config file. If you copy this for your server, make sure you change the certs to reflect the names of your certificate files.
# Example OpenVPN Config File
# User and group (Change to reflect your server's config)
user                _openvpn
group               _openvpn

# Network Setup
port                1194            # Default OpenVPN Port
proto               udb             # Preferred OpenVPN protocol
dev                 tun0            # OpenVPN tunnel or tap device (may need to be changed for your system)

# CA and Server Certificates
ca                  /etc/openvpn/CA.crt         # CA Certificate (Change to reflect your file name)
crl-verify          /etc/openvpn/CA_CRL.pem     # CRL File (Change to reflect your file name)
cert                /etc/openvpn/server.crt     # Server Certificate (Change to reflect your file name)
key                 /etc/openvpn/server.pem     # Server Private key (Change to reflect your file name)
dh                  /etc/openvpn/dhparam.pem    # DHParam file (Change to reflect your file name)

# TLS Settings
tls-version-min     1.2
auth                SHA512
cipher              AES-256-CBC
# Limit TSL ciphers to impove security by removing weak ciphers suites
tls-cipher          TLS-DHE-RSA-WITH-AES-256-GCM-SHA384:TLS-DHE-RSA-WITH-AES-256-CBC-SHA384:TLS-DHE-RSA-WITH-AES-128-GCM-SHA256:TLS-DHE-WITH-AES-128-CBC-SHA256

# VPN Network configuration
server              196.168.254.0 255.255.255.0     # Must not conflict with your LAN IPs
ifconfig-pool-persist   /var/db/openvpn/ipp.txt     # Persists client leases between server restarts
comp-lzo                                            # Enables LZO compression
keepalive           60 120                          # Keepalive to provide compat with stateful firewalls

# Client Configuration
push            "route 192.168.1.1 255.255.255.0"   # Push LAN route to client
push            "redirect-gateway def1"             # Redirect gateway save origional default gateway
push            "dhcp-option DNS 192.168.1.1"       # Push LAN DNS server to client so they can resolve internal resources.
push            "dhcp-option DOMAIN home"           # Push LAN Domains to client so they can do unqualified lookups.

# Logging
status              /var/log/openvpn/status.log
verb                5
FWIW, I’ve had persistant problems getting the tls-cipher directive to work properly with the iOS OpenVPN client. It may be necessary to remove or comment that out.
To test OpenVPN, start it from the command line using openvpn server.conf. This will display the output to the terminal instead of logging it.
Assuming you installed OpenVPN from a package, once you’ve tested everything you can use the regular service/systemctl/rc.d scripts to start the service.
iOS OpenVPN Client Config
OpenVPN’s iOS client requires a two stages for the config.
First you must export from XCA your client’s certificates in PKCS #12 format. You’ll also need a copy of the CA certificate for the server so that the client can verify that the server is properly signed.
Depending on what methods you have at your disposal getting the client certificate to the iOS device is kind of a hassle. You can mail it to your self, or if you have a web server on your local network that you can upload it to you can install it through Safari. Remember, that while the PKCS12 format is encrypted, it’s still a good idea now to go posting it all over the place if you can avoid it.
Uploading the OpenVPN configuration file is a little easier, that can be done through iTunes. Not it must have the extension ovpn for OpenVPN to detect it.
Below I’ve included a sample configuration for the client config. Like the server, you’ll need to change this to reflect your specific settings.
# OpenVPN Client Config Using Key Chain for Certs
client

# Remote Connect Setup
dev                 tun
proto               udp
remote              example-domain.example-dynamic-dns.net 1194
resolv-retry        infinite

# Client Configuration
nobind
persist-key
persist-tun
comp-lzo
verb                1           # Minimize Logging
tls-version-min     1.2
auth                SHA512
cipher              AES-256-CBC
<ca>
# Copy and paste the contents of your CA.crt between these tags.
</ca>
That should about cover the basics. At least I should say that should be enough for me to remember what I need to do next time I have to do this in n-years.
This is nicely documented Jason — thanks! I’m working on an OpenVPN Server “recipe” for a version of OpenWRT/LEDE called ROOter. I plan on pointing people to XCA and this guide for creating and managing certificates and keys. Great work.